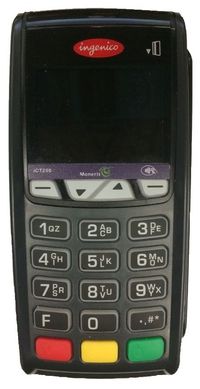
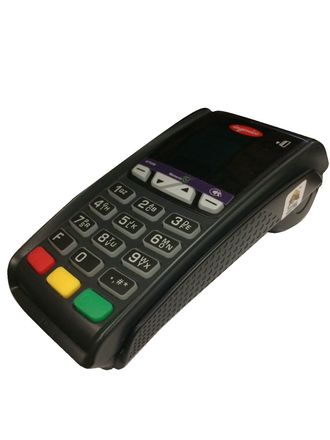
Please first read the system requirements below to verify your system will accommodate the iCT250.
Please note that the iCT250 will not be used to connect to an electronic cash register (ECR).
System Requirements
Note: The iCT250 requires a wired Ethernet connection to process transactions with our payment plug-in.
- PC or Mac running Windows 7 or later (cannot be used with any version of macOS)
- Ethernet connection
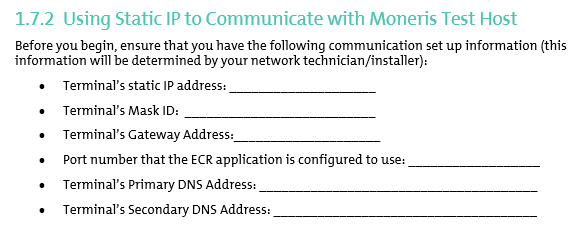
- Static IP address required (provided by your network installer/technician):
- Terminal’s static IP address
- Terminal’s Mask ID
- Terminal’s Gateway Address
- Terminal’s Primary DNS Address
- Terminal’s Secondary DNS Address
Review the Moneris IP Readiness Checklist (available at moneris.com/checklist) to ensure that your Ethernet service is ready to support your terminal.
Page Contents
Step 1: Download and Install the CMS Terminal Integration Service
Step 2: Set Up the Terminal and Connect to the Network
Processing Transactions Through the Plug-in
For assistance with troubleshooting, please contact CMS Support
CMS Support
801.623.4000 option 2
Step 1: Download and Install the CMS Terminal Integration Service |
|---|
- Click to download and install the file here: CMSTerminalIntegrationServiceInstallerV2_1.08.7000.exe
- Open and run the downloaded file. The file can be opened from the browser window or in the Downloads folder.
- Follow the instructions in the file to complete the installation.
Step 2: Set Up the Terminal and Connect to the Network |
|---|
The iCT250 requires a wired Ethernet connection to process transactions with our payment plug-in and will not be used to connect to an electronic cash register (ECR). Therefore, please disregard any reference to an ECR or dial backup in the following instructions.
For written instructions on setting up the terminal, use the following guide provided by Moneris: Getting_Started_Guide.pdf. Begin at page 1 titled "1 Read this first: Overview procedures"
Please be sure to set up the terminal using a static IP address as described in section 1.7.2 "Using Static IP to Communicate with Moneris Test Host"
The Port Number to be used is 8081.
For video instructions, refer to the short demo found here:
Processing Transactions Through the Plug-in |
|---|
Once the terminal is set up and connected to the network, you can verify the setup was done properly by running a transaction. Run card transactions by swiping, dipping (EMV/Chip), or keying in card information.
Step 1: Enter static IP address and port number
The first time the plug-in is loaded, you will see the following pop-up. Enter the static IP address and the following port number: 8081.
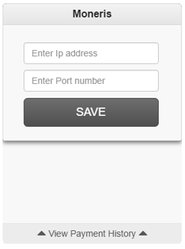
The IP address and port number are saved as a cookie in the browser. If the cookie is deleted for any reason, you will need to enter this information again.
Step 2: Run a transaction
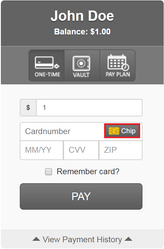
Manual/key entry
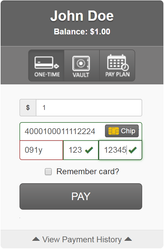
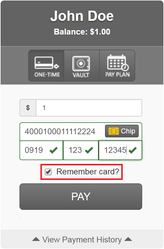
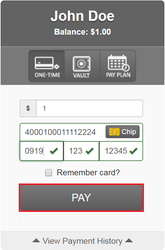
- Enter the card information. Fields will display a green check for valid entries. Fields will be highlighted in red for invalid entries.
- Check "Remember Card?" to save the card to the customer vault for future one-time or recurring payments. The 'Remember Card' feature is for keyed-in transactions only and cannot be used for swiped or chip transactions on the terminal.
- Click PAY to process a transaction.
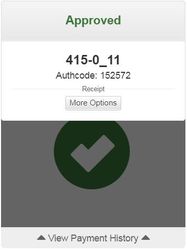
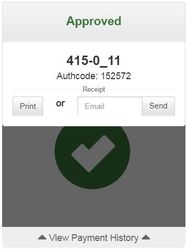
- Click More Options to print or email the receipt.
EMV/Chip
- Click Chip
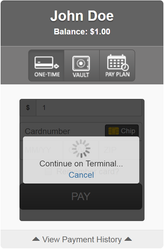
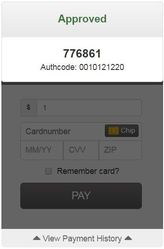
- Continue the transaction by following prompts on the terminal. The approval screen will be displayed in the plug-in once the transaction is completed on the terminal (be sure to press the green ENTER button to complete each transaction and return to the 'Ready/Welcome' screen).
- Receipts for swiped and chip transactions are generated with the terminal printer and are not available in the plug-in.
![]()
Article ID: 36000065645