Page Contents
Why is the Chip button grayed out/unclickable?
Why won't the terminal connect anymore?
How can I use multiple terminals with my account?
Why didn't I get an approval? Did the transaction go through?
Why does the Swipe button say Port?
Why is the Chip button grayed out/unclickable? |
|---|
After completing the installation (Miura M010 - Setup & User Guide), there are several potential causes for the Chip button to be grayed out and unclickable. Check in this recommended order:
- Browser cookies/cache/history may need to be cleared
- Verify that the terminal is recognized by the computer
- Driver may not be properly installed
- May need to switch the browser using the system tray application
- Certificate may not have been installed automatically
Browser cookies/cache/history may need to be cleared
- For instructions on clearing the browser cookies/cache/history, click a link below:
- Chrome: https://support.google.com/accounts/answer/32050?co=GENIE.Platform%3DDesktop&hl=en
- Firefox: https://support.mozilla.org/en-US/kb/delete-cookies-remove-info-websites-stored under section titled "Delete all cookies"
- Internet Explorer: https://kb.wisc.edu/helpdesk/page.php?id=12314
- Edge: http://www.thewindowsclub.com/delete-browsing-history-cookies-data-edge
2. Close and reopen the browser.
3. Continue on number 3 in Step 2 in the Setup Guide here: Miura M010 - Setup and User Guide#SetupandUserGuide-connectingtoplug-in
Verify that the terminal is recognized by the computer
1) Open the Device Manager. This can be done several ways:
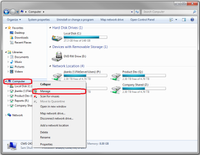
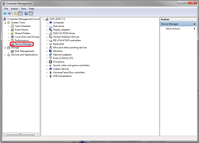
Option 1: Open the Windows Explorer. Right-click on Computer and select Manage. Select Device Manager from the list.
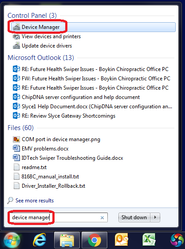
Option 2: Open the Start menu.Type Device Manager in the search bar and select the Device Manager from the menu.
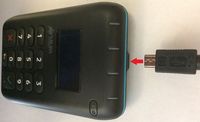
2) Plug in the terminal cord to the USB port, and connect the cord to the port at the top of the terminal making sure the cord is pushed all the way in. It may take a few minutes for the terminal display to turn on while the battery charges.
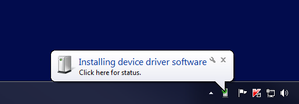
3) The driver for the terminal should begin installing automatically. A message will appear once the driver has been installed. If the driver does not install properly, click here for instructions to download driver software.
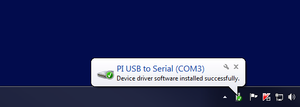
4) In the Device Manager window, click on the small arrow next to Ports (COM & LPT). You should see PI USB to Serial (COMX) where 'X' is a number.
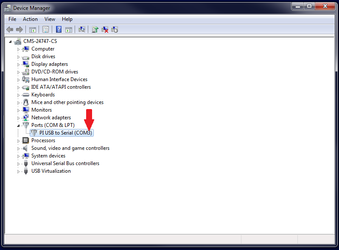
5) To verify that the driver is working properly, unplug the terminal. PI USB to Serial (COMX) should disappear from the list in the Device Manager window.
6) Plug in the terminal again. PI USB to Serial (COMX) should appear again in the Device Manager window.
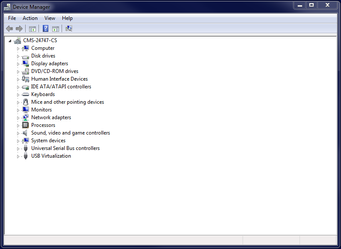
If the Ports (COM & LPT) option is not appearing when the terminal is plugged in:
- Unplug and plug in the cord on the top of the terminal. Verify the terminal is plugged in firmly (top of terminal and into the computer itself).
- Install the driver manually. Click here for instructions.
- Unplug the terminal and try another USB Port.
- If none of the above resolve the issue, restart the computer and repeat previous steps.
Driver may not be properly installed
If the following error is encountered:
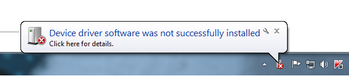
Install the following driver package:
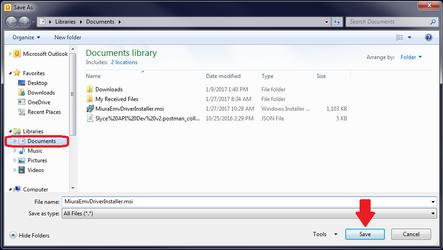
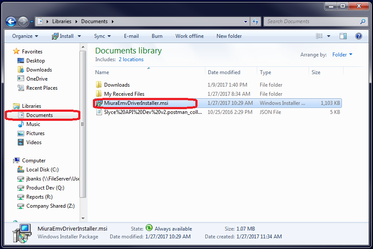
1) Copy and paste the following link in your browser to download the proper driver.
https://SlycePay.com/SlyceEMV/MiuraEmvDriverInstaller.msi
2) Save the file to a folder (defaults to Documents folder) and double-click on MiuraEmvDriverInstaller.msi to run the installation.
Continue on Step 3 in the Setup Guide here: Miura M010 - Setup and User Guide#SetupandUserGuide-connectingtoplug-in
May need to switch the browser using the system tray application
The Miura M010 can be used in Chrome, Firefox, Internet Explorer, and Edge. By default, the installation will enable the terminal to be used in Chrome, Firefox, and Edge. To switch to Internet Explorer, follow the steps below:
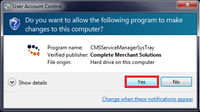
- Double-click on the CMS Service Manager icon on the desktop.
- Click Yes to allow changes.
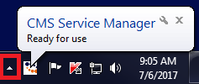
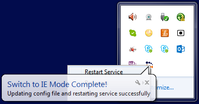
- Click the arrow to show hidden icons.
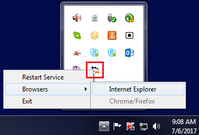
- Right-click on the CMS Online icon.
- Select Browsers and select Internet Explorer.
- A message will appear saying the switch to IE mode is complete.
- Repeat the steps to switch back to Chrome/Firefox/Edge.

Certificate may not have been installed automatically
The certificate normally installs automatically when running the CMS Terminal Integration Service installation.
To verify whether the certificate installed properly, follow the instructions below:
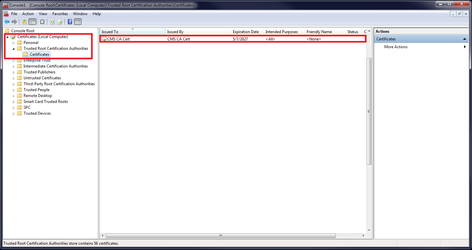
- Type certmgr.msc in the search bar of the Start menu and hit Enter.
- Go to Certificates>Trusted Root Certification Authorities>Certificates
- Check whether CMS CA Cert appears in the Issued To column. If so, the certificate is properly installed.

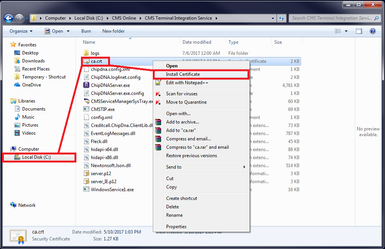
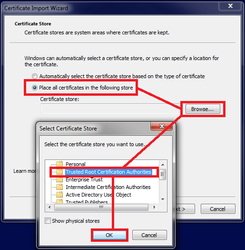
If the certificate is not installed, follow the instructions below to install:
- On the C: Drive, go to CMS Online>CMS Terminal Integration Service>ca.crt
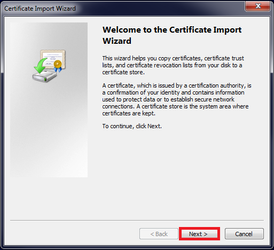
- Right-click on ca.crt and select Install Certificate.
- Click Next.
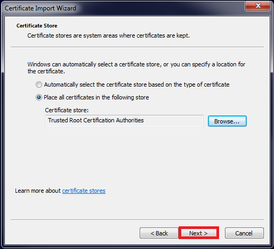
- Select Place all certificates in the following store and click Browse.
- Select Trusted Root Certification Authorities and click OK.
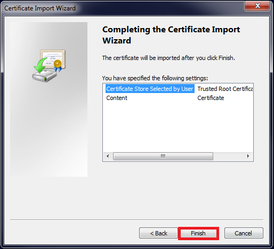
- Click Next.
- Click Finish.
Continue on Step 3 in the Setup Guide here: Miura M010 - Setup and User Guide#SetupandUserGuide-connectingtoplug-in
Why won't the terminal connect anymore? |
|---|
If the terminal was previously connected/working but will no longer connect, try the following:
Browser cookies/cache/history may need to be cleared.
- The terminal will sometimes become disconnected from the plug-in if it is unplugged from the computer and plugged into a different USB Port.
Verify that the terminal is recognized by the computer.
- The USB Port may have an issue preventing the computer from recognizing the terminal.
What browsers can I use? |
|---|
The Miura M010 can be used in Chrome, Firefox, Internet Explorer, and Edge. By default, the installation will enable the terminal to be used in Chrome, Firefox, and Edge. For instructions on switching to Internet Explorer, click here.
How can I use multiple terminals with my account? |
|---|
If the account is set up to have multiple terminals connected, follow the instructions below:
- Plug in the terminal to be used.
- Load the plug-in.
- You will be prompted to select the serial number from the back of the terminal in the displayed dropdown. Note that the serial number in the dropdown will not include the preceding "0" or the dash "-".
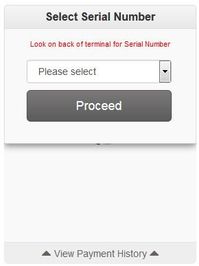

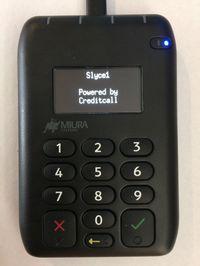
- Click Proceed. The terminal should be ready to use within a few seconds once this screen is shown:
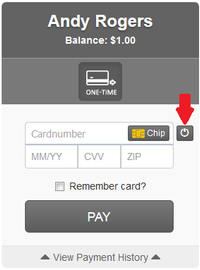
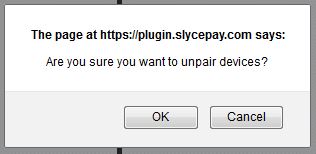
If using a different terminal with the same computer, use the button pictured here to disconnect the current terminal and connect a different terminal. Note that unpairing the device will clear the browser cookies.
Once the terminal is unpaired, the user will again be prompted to select a serial number. After selecting the serial number, you may need to close and reopen Slyce plug-in to get the terminal to connect.
Why didn't I get an approval? Did the transaction go through? |
|---|
If no approval was displayed, or if the transaction does not show in your software reports:
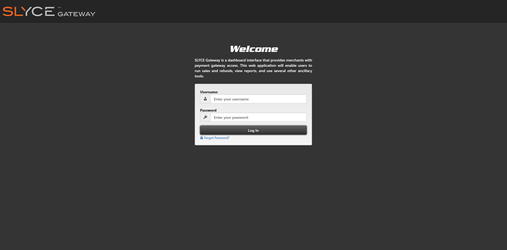
- Log in to Slyce Gateway here using your CMV credentials: https://www.slycegateway.com/login
- Click on Reports in the left-side menu.
- Click on Transactions.
- By default, transactions for today should be shown. If the transaction appears here, it was processed correctly.
To investigate the cause of the issue, please contact your software provider who will determine whether CMS support will need to be contacted.
![]()
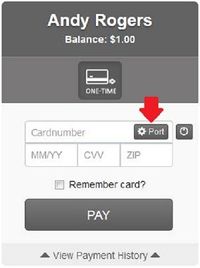
Why does the Swipe button say Port? |
|---|
If the plug-in is unable to properly identify the COM Port associated with the terminal, you will see an option to enter the Port manually.
- Click the Port button pictured here:
- Type only the number of the COM Port here (do not enter "COM"). If you do not know the COM Port number, click here for instructions to locate it in the Device Manager.
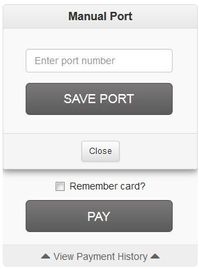
- Click Save Port.
CMSTerminalIntegrationServiceInstaller_1.05.5500.exe
Article ID: 36000065439