If you have Console 2 Follow the instructions below.
If you have Console 1, scroll to the bottom of the page for instructions.
This article will walk you through how to create an additional user within the Complete Gateway. Once logged in you will find a menu to the left of your screen. From here select the Settings option. An additional menu will appear with one option being Users, select this option.

A new screen will appear with a list of all the current users within the gateway. From here select the Add New User button.

Complete the User Information by entering the username, email, password and the starting page where you would like the user to begin on when logging in. The Allowed IP's is an option to put a users computer IP address. This will restrict what computers that user can access the gateway with.

The General Settings tab at the top allows you to determine the role of the user. For a Master Account check the option to the right to On.
The Allow Password Change will allow the user to adjust their password after a 90 required password Change request.
The External Software will allow the user to include mobile payment terminals such as IOS and Android devices to allow a user login access through these devices.
Two Factor Security allows for additional security to be placed on each level. There is a Low, Medium and High setting to help tailor to your needs.

Additional restrictions can be place on each user through the Console Permissions tab. This can restrict or provide access to reporting, running sales transactions, restricting or adding fraud modules, etc. The Console Permissions correlates with the main menu section located on the dashboard. For an example, if you wanted your new user to only have access to run Sales transactions and not refunds, you would go to the Transactions tab and select "New Order" like in the example below.

Once the permissions are set and you are ready to create the user, select the save button at the bottom of the screen.

A confirmation will flash on the screen and the new user will be listed under the User Manager screen.

If you have any further questions on setting up a new user or would like to learn more about the Complete Gateway, feel free to reach out to Customer Support at 1-877-267-4324 or support@nexiopay.com.
Article ID: 36000132558
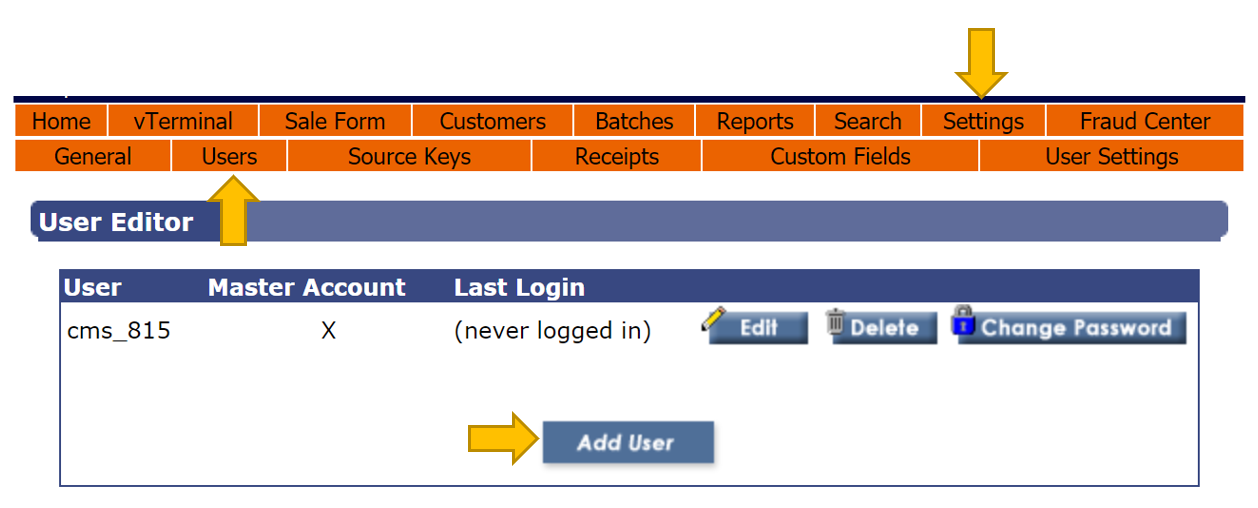
If you have Console 1 follow the instructions below:
This article will walk you through how to create an additional user within the Complete Gateway. Once logged in you will find a series of tabs listed at the top of the screen, select the Settings tab. A sub menu will appear with additional tabs, select the Users tab. This screen will show all users currently available within the gateway. From here select the Add User button.
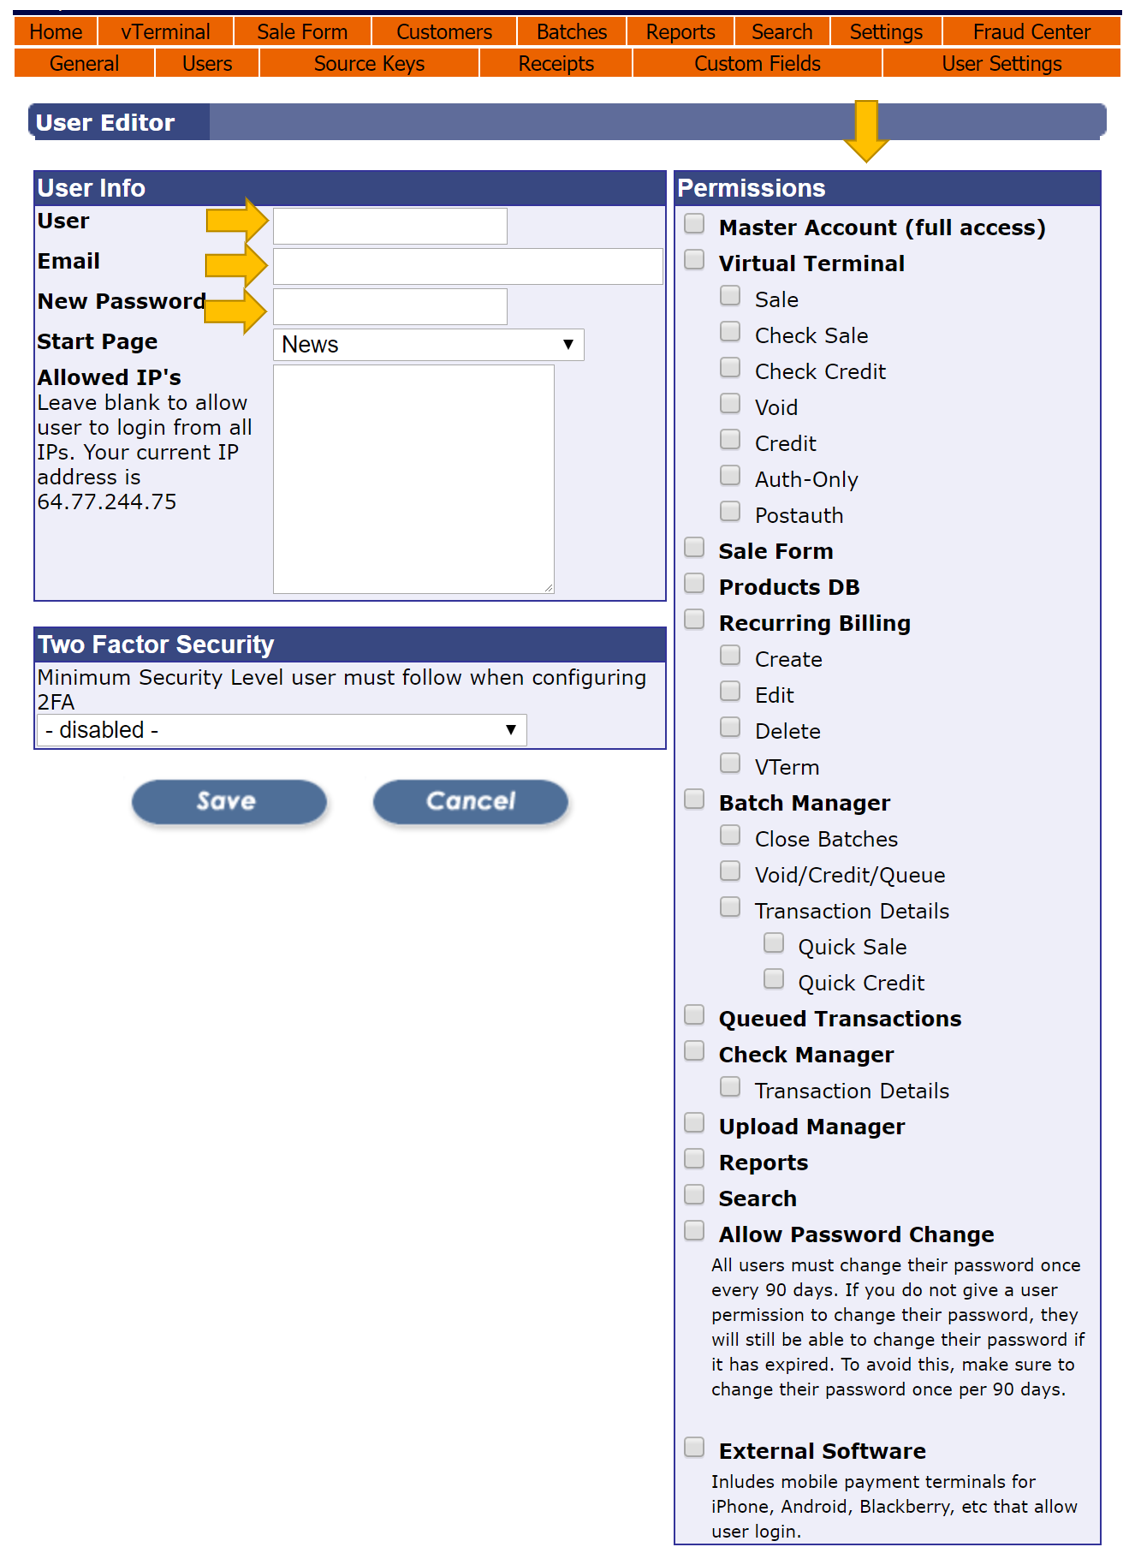
The User Editor screen will appear providing you with several options. First, complete the User Information by adding the username, email address and password to the left of the screen.
The Permissions section will allow you to provide difference access points to the user within the gateway. If you would like this user to only have access to reporting you will select the Reports option. If you would like the user to only run sales transaction, select the Sale option under the Virtual Terminal section.
You will find that the Permissions section is the same as the menu tab at the top. If you want your user to have access to the tab(s) and the information in the tabs select that potion in the Permissions section.
If you have any further questions on setting up a new user or would like to learn more about the Complete Gateway, feel free to reach out to Customer Support at 1-877-267-4324 or support@nexiopay.com.